Welcome to AbleCon support
- we are here to help you
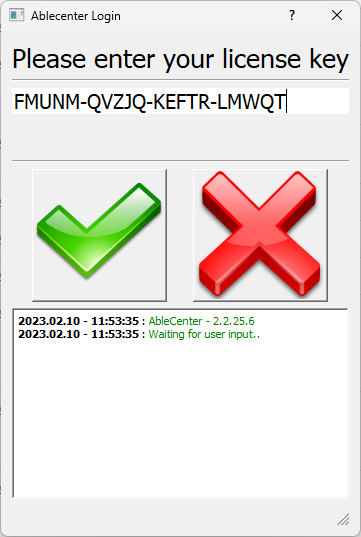
AbleCenter Activation
Open application store and install AbleCenter app:
- Microsoft Windows: Start Microsoft Store app. Search for «AbleCenter».
- Apple MacOS / iOS: Start App Store. Search for «AbleCenter».
- Android / Chrome OS: Start Google Play. Search for «AbleCenter».
- Enter the key that comes with the AbleCenter product.
- Make sure to type everything in capital letters and with dash.
- Make sure you have an active internet connection when activating.
Windows:
- Right-click inside the software and select “Settings“
- In source tabs: Check for AbleCamera-AC3 and AbleGrabber
- Proceed to the Advanced tab
- Activate Auto Connect WiFi
- Type in «AbleCenter» as network name and «******» as password (contact us at service@ablecenter.no or +47 40082011 for network password)
iPad:
- Open the App
- Hold your finger in the center of the screen
- Then select settings in the bottom right corner
- Advanced
- Check the box «Auto-Connect» and enter «AbleCenter» as network name and «******» as password (contact us at service@ablecenter.no or +47 40082011 for network password)
- Press the green button to save the changes.
Open application store and install AbleCenter app:
- Microsoft Windows: Start Microsoft Store app. Search for «AbleCenter».
- Apple MacOS / iOS: Start App Store. Search for «AbleCenter».
- Android / Chrome OS: Start Google Play. Search for «AbleCenter».
- Enter the key that comes with the AbleCenter product.
- Make sure to type everything in capital letters and with dash.
- Make sure you have an active internet connection when activating.
Windows:
- Right-click inside the software and select “Settings“
- In source tabs: Check for AbleCamera AC-3 and AbleGrabber
- Proceed to Advanced tab
- Activate Auto Connect WiFi
- Type in «AbleCenter» as network name and «******» as password (contact us at service@ablecenter.no or +47 40082011 for network password)
iPad:
- Open the App
- Hold your finger in the center of the screen
- Then select settings in the bottom right corner
- Advanced
- Check the box «Auto-Connect» and enter «AbleCenter» as network name and «******» as password (contact us at service@ablecenter.no or +47 40082011 for network password)
- Press the green button to save the changes.
If the correct login information has been entered, the app should switch to camera network at the next reboot.
FAQ
- Make sure you are connected to a network with an active internet connection when activating the AbleCenter application / app.
- Make sure your device is connected to the “AbleCenter / AbleCenterN” wireless network.
- Make sure your network card is enabled on your computer. Click the network icon at the bottom of the Windows taskbar and open the Network and Sharing Center. Then click change network adapter settings and activate the correct network connection.
- Check the settings in the software, right-click in the AbleCenter program image or hold your finger in the middle of the screen if you are using iOS or Android, then select settings and check that the correct camera and/or AbleGrabber is selected.
- Press F10 (to switch to the camera)
- If you have problems with Auto-focus, you can contact us directly.
- Check the light and contrast settings on the computer screen.
- Check the light and contrast in the camera, possibly reset the camera settings by pressing the hotkey R in the AbleCenter software.
- Make sure the camera lens and the outer glass cover are free of scratches, dirt, or liquid. Wipe the glass cover with a dust-free cloth.
- Unplug the power cord from the AbleGrabber, wait 1 minute and plug it in again.
- Press F11 to switch to the AbleGrabber image (F10 to switch to the camera image)
- Make sure the HDMI splitter is connected properly (applies only to those who do not have HDMI out on the interactive screen)
- Make sure the AbleGrabber is connected correctly. A monitor cable (VGA / HDMI) from the out-port on the projector or Smart-Board (VGA-out or monitor-out / HDMI-out) and into the in-port on the AbleGrabber.
- Make sure that: a network cable is connected from the ethernet port on the AbleGrabber device to one of the available four numbered LAN ports on the router.
- If you have an HDMI signal that goes into the projector/SmartBoard, there must also go an HDMI signal out from the projector/SmartBoard and into the AbleGrabber. The same applies to VGA connections. Neither the projector nor the SmartBoard can convert a digital signal to analog and vice versa.
- Check the configuration on the Projector or SmartBoard. Check that the VGA signal out is activated and that the image is displayed on the projector screen.
- Blue screen: If there is a blue screen instead of an image, it means that you have contact with the AbleGrabber and that the problem lies within the image transferring. Make sure that the output port on the projector or SmartBoard is active. The resolution of the sender/teacher's PC may also be the cause of this problem. To adjust the resolution, you must be on the computer's desktop. Then right-click and scroll down to "Display Settings" or "Display Resolution" depending on the version of Windows you have. There you must set a higher resolution than 1380 × 800. Then press use. When using Windows 10, you must further click on "Advanced Display Settings" and set a higher resolution: 1380 × 800 (resolution may vary from PC to PC, feel free to try all of them). Then press use. NOTE! these settings need to be changed after connecting the VGA / HDMI cable.
- Nothing happens when I press F11: Sometimes the "Windows Firewall" blocks the connection between the AbleGrabber and the PC. To solve the problem, go to "Windows Firewall" settings and allow "AbleCenter" to have full access to the network.
- Check if the router is switched on (flashing light), check the power connection, and the on/off button.
- Check the WiFi button on the side of the router, it should be pressed.
- The PC may have an old network card which only allows the AbleCenterN (2.4GHz) network to appear. You can consider switching to a PC that has a 5Ghz card or inserting an external USB 5Ghz network card that provides access to the AbleCenter (5GHz) network.
- Connect the Internet cable to the WAN/Internet port on the AbleCenter router.
- Enable "Auto-Connect" on advanced settings in the AbleCenter software. This feature allows the application to automatically connect to the AbleCenter/AbleCenterN network while using the software, and disconnect from the network after closing the software.
- Use an external USB wireless network card to be connected to the ‘AbleCenter’ and leave the internal wireless network card connected to the Internet.
- Start by enabling "measure performance" on advanced settings in the AbleCenter software to check performance.
- If you have changed to Full HD resolution “1920 × 1080” you may want to go back to * 1280 × 720 to reduce delays.
- If you get below 50fps on PC and below 30fps on tablets, you can change the * framerate settings. This can be found in the "advanced settings" in the AbleCenter software.
- If the measurement shows that you have a "delay" that is higher than 30ms then you can change the * framerate settings. This can be found in the "advanced settings" in the AbleCenter software.
- * Frame rate and resolution settings require a software restart and may take up to 15-20 seconds to apply.
- Right-click on the power icon to check which mode it is set to. (High performance is preferred)
- Check if the main power (charger) is connected.
- Check which network you are connected to, the preferred network is the 5GHz network "AbleCenter", the 2.4Ghz network is "AbleCenterN" and will not always deliver as fast image transferring as the 5Ghz network.
- "Auto-Connect" is removed from the "AbleCenterN" network, and set the "AbleCenter" as the default network.
- It may take some time before the "AbleCenter" network appears after restarting the router.
- Update to the latest AbleCenter version.
- In some cases, the 2.4 GHz network may be less busy and work better.
- The user's PC / device can be the cause of frame drop and latency. We recommend having a machine with i5 or i7 processors, a minimum of 8GB RAM and SSD disk, network card that supports 802.11ac (5GHz network)
-
- iPad/MacBook/Chromebook/Android – Open AppStore/GooglePlay and search for: “AbleCenter“
- PC - Open Microsoft Store and search for: "AbleCenter"
Video

AbleCenter® - Installation ceiling plate
AbleCenter® - User manual
AbleCenter® - Connection and setup
AbleCenter® - OCR language

Installation of AbleCenter on iPad and iPhone
Installation of AbleText™ on iPad and iPhone
AbleCenter® - Using AbleCenter on iOS
AbleGrabber™ - Set up
AbleGrabber™ - Connection
Adjusting power settings for best performance
OCR from AbleGrabber™
AbleBaby™ - Set up
If you have any questions?
Contact us
Welcome to AbleCon support
- we are here to help you
This is tab content!
This is tab 2!
AbleCenter Activation
Open application store and install AbleCenter app:
- Microsoft Windows: Start Microsoft Store app. Search for «AbleCenter».
- Apple MacOS / iOS: Start App Store. Search for «AbleCenter».
- Android / Chrome OS: Start Google Play. Search for «AbleCenter».
- Enter the key that comes with the AbleCenter product.
- Make sure to type everything in capital letters and with dash.
- Make sure you have an active internet connection when activating.
Windows:
- Right-click inside the software and select “Settings“
- In source tabs: Check for AbleCamera-AC3 and AbleGrabber
- Proceed to the Advanced tab
- Activate Auto Connect WiFi
- Type in «AbleCenter» as network name and «******» as password (contact us at service@ablecenter.no or +47 40082011 for network password)
iPad:
- Open the App
- Hold your finger in the center of the screen
- Then select settings in the bottom right corner
- Advanced
- Check the box «Auto-Connect» and enter «AbleCenter» as network name and «******» as password (contact us at service@ablecenter.no or +47 40082011 for network password)
- Press the green button to save the changes.
